This weekend I had some time to continue with the scratchboard piece I have been working on and finally have gotten down to scratching.
The step following a finished sketch that I am happy with is to transfer the image to the size I want the final work to be. While I like to plan in a handy size sketchbook, (usually 9 X 12), I usually want an impressive piece of art to be larger. (I hear artists say that size doesn't matter when it comes to art, but in shows, 9 times out of 10 I believe it does.) Ultimately, an excellent large work of art is going to outshine an excellent small piece. (Though I do like small pieces and it offers more affordable art for some collectors!)
The step following a finished sketch that I am happy with is to transfer the image to the size I want the final work to be. While I like to plan in a handy size sketchbook, (usually 9 X 12), I usually want an impressive piece of art to be larger. (I hear artists say that size doesn't matter when it comes to art, but in shows, 9 times out of 10 I believe it does.) Ultimately, an excellent large work of art is going to outshine an excellent small piece. (Though I do like small pieces and it offers more affordable art for some collectors!)
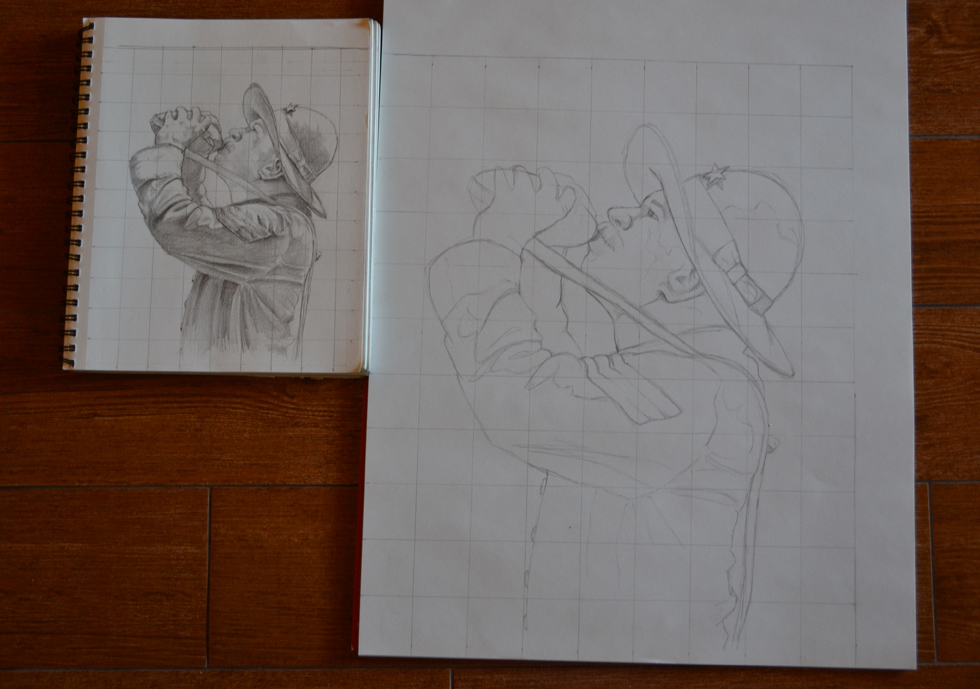
An absolutely necessary skill -- let me repeat-- An absolutely necessary skill for an artist to learn is gridded transfer. I try to impart this to all my students but it is an invaluable skill that allows you to take your work and enlarge it to any size you so wish. Here, I took my sketch, which ended up being 9 X 11, and recreated it to 16 X 20. A little bit of math is involved and while it would have been nice if my image had been 8 X 10, meaning the larger grid just had to be doubled, it didn't work that way and I did some rounding to get approximately 1.8 inches for the larger squares. (Of course, I gridded the smaller image at 1 inch intervals.) Now for this larger image, since I am going to trace over it with pen, I don't bother on too many details or shading--only what I will need to transfer, which are the main contour lines.
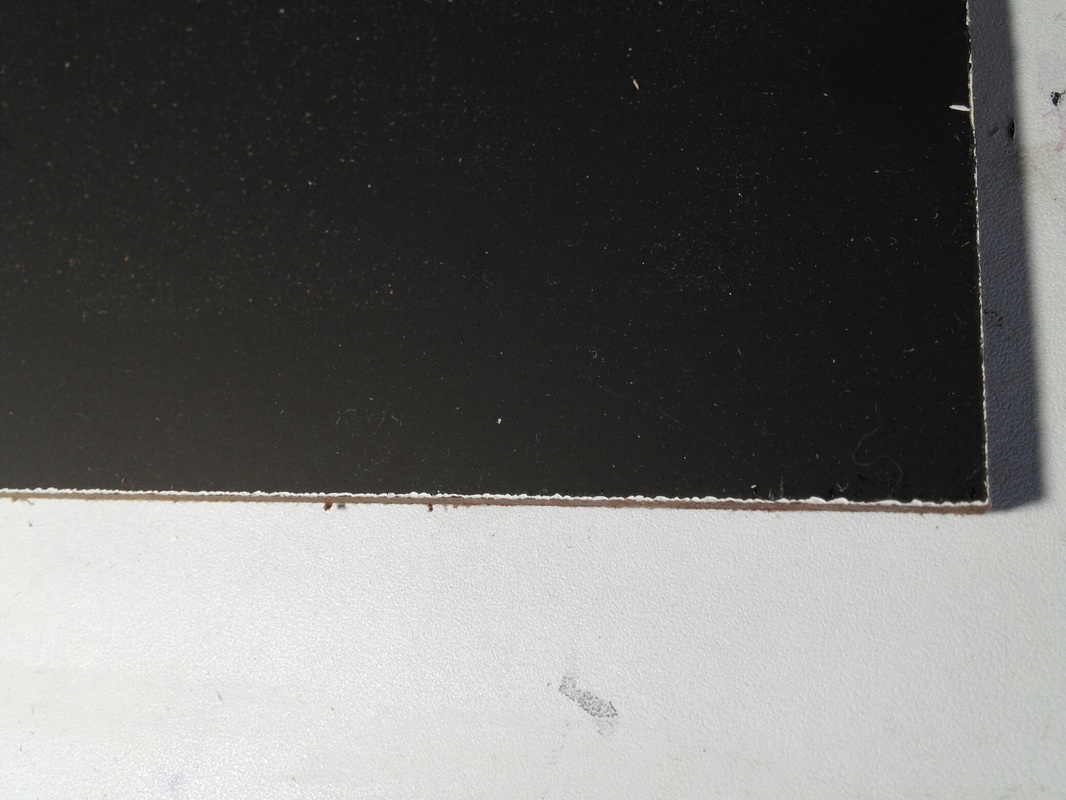
Next, I need to prepare my scratchboard. I save a little money by purchasing the largest boards Ampersand makes without calling them and special ordering, and that is 24 X 36. DickBlick.com has them at a reasonable price. (And they run special sales, which is always nice!) I then take the large boards and cut them down to whatever size I want. This is done with a fine blade on a table saw and some blue painters tape where I will be cutting. So far I haven't had a problem, but the edges come out with a SLIGHT roughness:
Next, I need to prepare my scratchboard. I save a little money by purchasing the largest boards Ampersand makes without calling them and special ordering, and that is 24 X 36. DickBlick.com has them at a reasonable price. (And they run special sales, which is always nice!) I then take the large boards and cut them down to whatever size I want. This is done with a fine blade on a table saw and some blue painters tape where I will be cutting. So far I haven't had a problem, but the edges come out with a SLIGHT roughness:
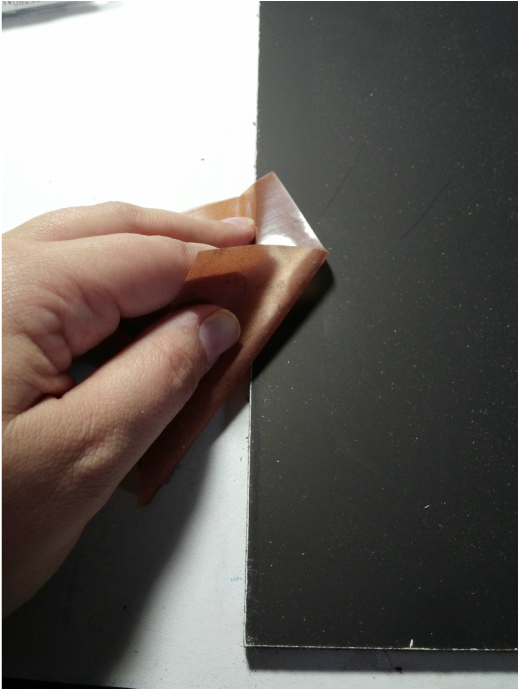
Yes, this will be hidden by the edges of a frame, but I still don't like it. So a fine grain sandpaper taken to the edges makes the OCD side of me happy:
Now this of course will require some repair to the ink. I have tried different inks, but in the end, I called Ampersand and purchased some of their ink. (You can purchase small bottles online but I called because I wanted a lot since sometimes I run it through my airbrush.) After discussing ink with Ampersand, I discovered their ink is not a pure India ink, which is why I could never find a perfect match through another company!
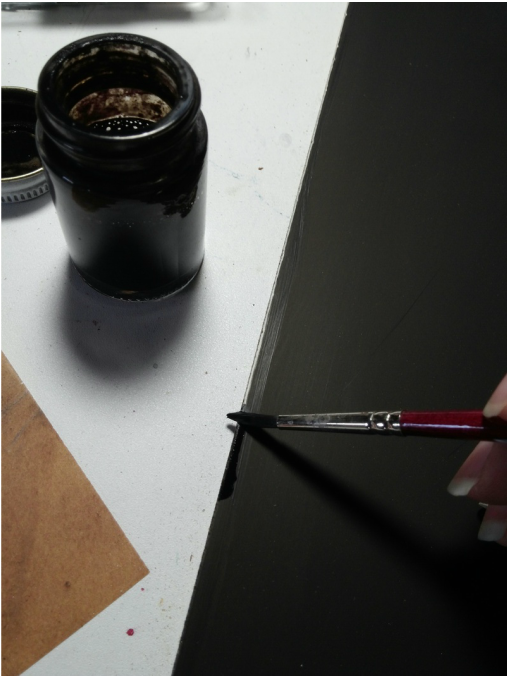
Now after applying the ink, you'll see a difference in the ink that has been applied by a brush and the ink that was factory sprayed. Do not panic. After you apply a varnish, the difference will disappear. Trust me.
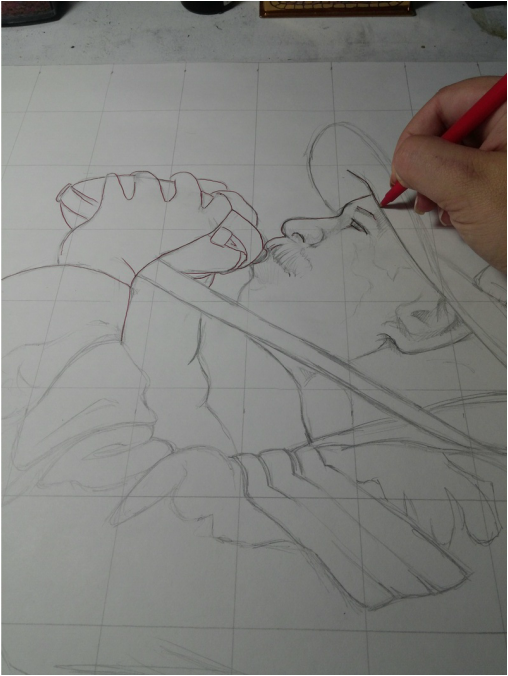
Now comes the transfer. I place my large sketch over the board and tape down and find a ball point pen. I prefer a red or blue one so I can more easily see where I have drawn. Then I trace. Pressing down with just a little bit of pressure will create a small indention into the board that will help guide you as you work. (Note: some scratchboard artists prefer to use white transfer paper but I have found the white just messes with my mind and prefer doing it this way. If there is a line that will be black--deep in shadow--don't trace it as you will then have an indention in the middle of a black space in the art.)
Now comes the transfer. I place my large sketch over the board and tape down and find a ball point pen. I prefer a red or blue one so I can more easily see where I have drawn. Then I trace. Pressing down with just a little bit of pressure will create a small indention into the board that will help guide you as you work. (Note: some scratchboard artists prefer to use white transfer paper but I have found the white just messes with my mind and prefer doing it this way. If there is a line that will be black--deep in shadow--don't trace it as you will then have an indention in the middle of a black space in the art.)
After the transfer, I pull up the sketch, check to make sure all of my tracing transferred to my satisfaction, and I am ready to begin! (Later this week I will talk about tools and update you on my scratchy progress.)
 RSS Feed
